How to make an end grain cutting board from oak kitchen worktops
As part of a kitchen renovation, I started over a year ago, which hasn't finished yet, we decided to go for oak worktops, which look great. I had lots of offcuts from the worktops and didn't want just to throw them away. With Christmas coming I thought a nice gift for some family members would be an oak end grain cutting board. It's a personal gift being handmade, plus end grain cutting boards are a nice piece to have in the kitchen. So, where do you start?
Why end grain?
Why make it harder for myself and make an end grain cutting board, when I could have just cut a nice shape and sanded it and put a nice finish on it? Well, an end grain board is a much better cutting surface. The end grain makes a much firmer surface and knife blades don't easily slide into the end grain as they would when you cut with the grain. This makes a much longer-lasting cutting surface, and therefore a much longer-lasting cutting board, making the gift even better.
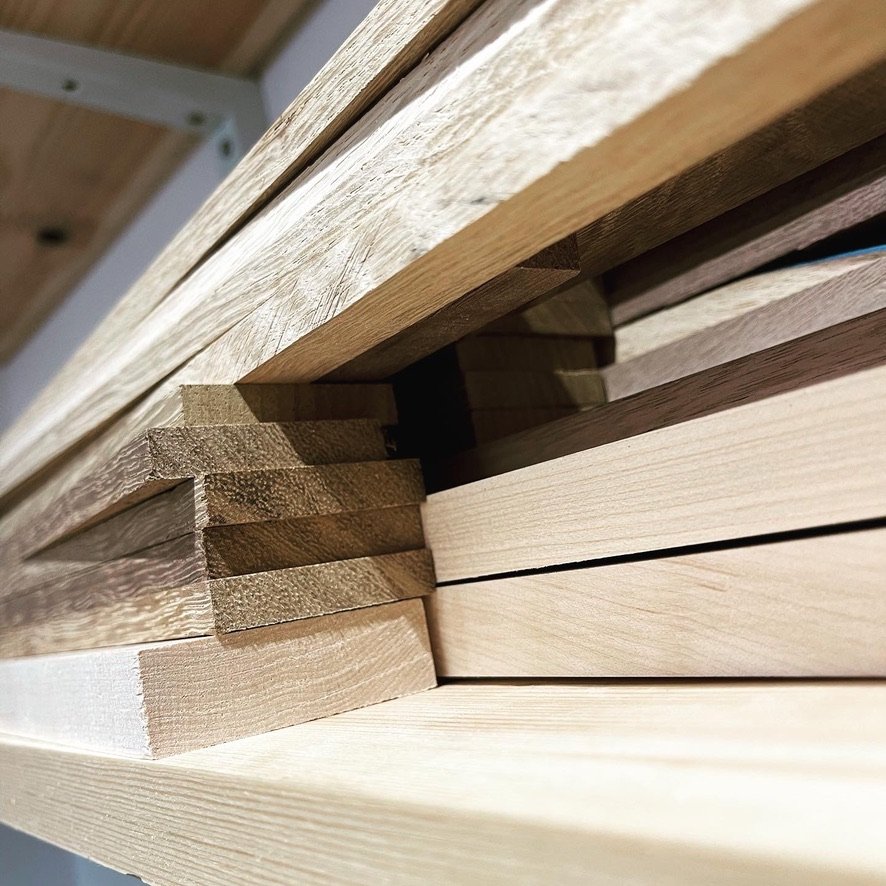
Cutting strips
The first thing to realise when making an end grain cutting board is that you need the end grain to make the surface of the board, so you need to cut the worktop offcuts to give you the thickness of the board that you want, plus a nice straight surface to glue up several strips to give you the size of board you want. Some of my offcuts didn't give me that, so I had to be a bit more selective with my choices of oak.

Strips of oak worktop
To cut the oak worktops, I am fortunate enough to have a table saw, which helps to give me straight repeatable cuts at the same width. You can use a track saw or a circular saw if you measure the strips and make sure the cut lines are straight. I was making six cutting boards, so I had to cut a lot of strips.
Adding a bit of flair
While an oak end grain cutting board looks nice, adding a bit more detail takes it up a level or two and gives it a bit more wow factor. What I wanted to add was a bit more variation in colour to the board. To contrast the oak, I added some strips of walnut and maple. I chose not to make these strips end grain but being a much harder wood than oak, I wasn't too concerned and they were only thin strips so the cutting surface would still be mainly the stronger end grain of the oak. That was the theory anyway.
Strips of walnut and maple
I bought the walnut and maple specifically for these boards and eBay provided me with a seller that was selling strips of maple and oak, prepared to an even thickness and squared on all edges to give me a good glue surface. It's a bit more expensive than milling the wood yourself, but you need more specialised equipment and time, neither of which I had.
The glue up
I'd only attempted one big glue-up prior to this, so I made use of the pipe clamps and any other clamp I could find to make sure the joints were strong. I used Gorilla Glue, and lots of it, to make sure the bond was good. There are loads of options for glue but I went with a known brand and it performed as I needed. Could I have saved a few quid on a lesser-known brand, probably, but I played it safe. I couldn't afford it to fail.
(Note: since doing this I have started to use a different brand of glue, Titebond, which has slightly better water-resistant properties. Not a big difference, just a bit better.)
Arrange the oak, walnut and maple strips into the pattern of your choice. It's up to you how uniform you make them, whatever you think works, just go for it. I went for a fairly consistent pattern for all my boards as I'd only bought a certain amount of walnut and maple to use.
One of the things to bear in mind here is that the better and flatter the glue-up, the less sanding you'll need to do after. So the more time and care you take here, the better. Make sure that you apply even pressure across the board, but also pressure to keep the board flat. You don't want a rocking cutting board!
To keep the board flat, you can use strips of plywood on their edge as they are very rigid, but be careful not to glue the plywood to the cutting board too. Use wax paper, packing tape or blue masking tape along the plywood to prevent it from sticking.

A clamped up and glued up cutting board
Now, clean up any drips that you can and leave them for 24 hours to cure.
Clamps off
The moment of truth. Remove all the clamps, taking care not to take a chunk out the board with a clamp or worse yet, drop the whole thing.
If you got enough glue in all the right places, then you should have a nice board with loads of hard glue on it. At this point, you realise just what a job you've got ahead to sand the board flat and whether or not you spend enough time preparing the wood and the clamps.

Cutting boards out of the clamps
As you can see from the photo above, I had a few misaligned strips of oak, which meant the sanding process on the top and the bottom was going to take a while. Some people are lucky enough to have big drum sanders to make the job easier or some people might have a fancy CNC machine to flatten the boards. Some people might even make a router jig and flatten the boards with that, but I didn't have any of those, so I stuck with a belt sander and an orbital sander with various grits of sandpaper, starting at 80 grit, through to 120 grit. This isn't the final finish, this is just the clean up stage.

Makita belt sander and Erbauer orbital sander
I have actually used the router jig and router to flatten a big chopping board I made recently, and I'll use that method again in the future, it works well and saves a lot of time but it does need some more advanced equipment.
Cutting the cutting board
Once you've got most of the glue lumps off and a flat enough surface, you might want to cut the boards to length. There's no point in spending ages sanding something you are cutting to cut off, so now it's back to the table saw, track saw or circular saw, to get the boards sized right. I didn't stick to a uniform size here, my approach was to get as big a board out of each glued-up board as I could. Just make sure you get it square. A wonky board at this point will be a lot more obvious.
One of things to try and avoid here is burn marks on the wood. If the blade spends too long in one place it can heat up and burn the wood. It does sand out, but it just adds to the time the sanding takes. I have actually got the wood smoking before, so just be careful and use a good blade on your power tool and don't let the blade sit in one place if you can help it.
The sands of time
Now you have the boards cleaned up and cut to size, you might think you've almost finished. Nope. It's time for more sanding. The sanding you've done to clean things up isn't good enough yet. So get the 120 grit out again with the orbital sander and start to get the board smooth on both sides. Try not to sand one area more than others as you won't get a flat board. For the boards I was making, I wasn't going to add feet to the board so I needed a flat surface. Also, I wasn't going to add a juice groove on the board so both sides of the board were going to be usable cutting surfaces so they both had to be right.

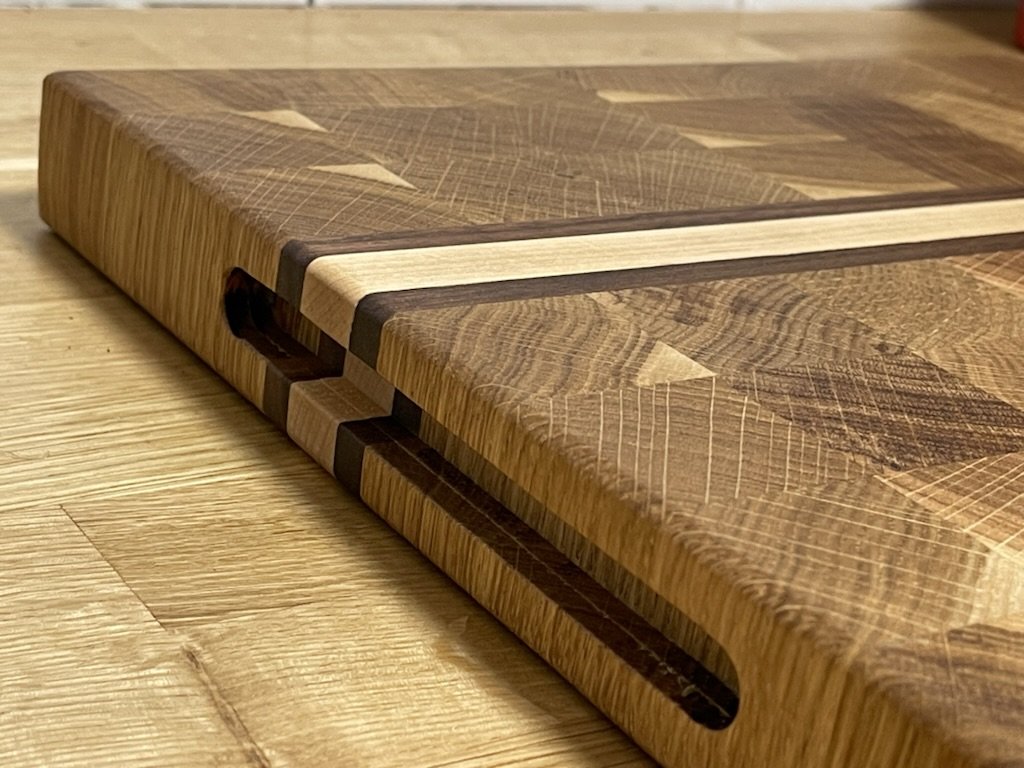
Oak end grain cutting board before oiling
Get the board smooth on all sides, including the edges, and you can round the corners off with the sander or a router if you have one. You can always leave the edges square, but rounding them off can help reduce the chance of the wood getting bashed. It doesn't need much, just a "smidge".
Once you've been over it with 120 grit, a good idea is to wet the board. This actually raises the grain a little and so sanding it again once that is does gives you a much smoother finish. I wouldn't go further than 240 grit when you sand it. I've seen people go further with amazing results, but I didn't think I needed it.
How to handle it
Now it comes to the detail. Handles and feet can be added in lots of ways. I wanted simplicity and I wanted both sides of the boards to be usable, so no feet on my boards this time. That just left the handles.
An easy option is to find some nice metal handles, that won't rust, and screw them to the sides. You get a great look and it's really simple to do. I took a slightly more complicated route as I didn't want handles sticking out the side. I decided to cut some finger slots in the edges for my handles. Big enough to get your fingers in and get a good grip, but not too big.
This is where the router is your go to tool of choice with a router bit to give you the shape that you want. You could go for a curved design, like I did, or a straight edge groove would work just as well.
Removing a lot of material into oak like this with a router bit is not easy and burning is an easy thing to occur when you do it. Go slow, take off a small amount of wood at a time and clamp everything well. Use a jig or router guide, like in the photo below, to make sure the router runs straight and, more importantly, won't slip off as they are dangerous tools if used incorrectly. It's also very easy to mess up the whole board at this point, so be careful and check everything twice before making a cut. If you aren't confident, screw on some handles instead.

Router and router bit of cutting handles

Handles cut into the cutting boards
You can see in this shot above that the handles I cut aren't perfect, but after some sanding they looked great and added to the slightly rustic appeal.
Remember woodworkers, if it's not perfect, it's "rustic".
The finishing line
So, you've now got your flat, sanded, square boards with handles cut or screwed in, feet added if you want, but they still don't look finished. That grain isn't popping out and they don't look very professional. This last step is very simple.
Get yourself a good quality food safe mineral oil or, like me, one that's been made for chopping boards and may contain a few extra things, but the mineral oil will do fine. Prep an area that you don't mind getting a bit messy and just pour that oil on. You can even fill a container big enough to submerge your board in it and do it that way. The idea is for the wood to soak up all that oil as much as possible.
It's here that you have to go "ooooooh, wow that looks amazing". I bet you do. I did. You can see what a difference to the colour and look it makes in this next photo.

Before and after finish
Cover the board and set it aside somewhere to dry off, then get another coat on. You can apply it with a cotton cloth (old cut up t-shirt) if you want to be a bit more controlled about it. Let that second coat dry.
I like to add a third layer of finish which is a food safe, oil wax finish. There are loads of places to get these. A lot of woodworkers make their own and there are recipes for it, or places like etsy to buy it. I bought mine from a YouTuber that I follow, Keith Brown from ragnbone workshop. No particular reason that I chose his brand, I just wanted to support his channel a little but there are lots of options to choose from.
Run on a good layer of wax oil finish and buff off any excess. Your board is now done and you should be very proud of what you've made. If it's for a gift, like mine, they will be well received and who knows, maybe you'll get asked to make some more and make a few quid from them. That's my plan when I've got my workshop back...... but that's another story.

Oak end grain cutting board in a kitchen
Summary
Most cutting board projects will follow the same approach and these steps:
Select the wood and cut it all to uniform strips. More care here will save time later.
Arrange the wood strips into your desired pattern.
Get your clamps and start the glue up using suitable glue, make sure you put plenty of glue on.
Make sure you have even clamping pressure across the board and on the top and bottom to avoid cupping.
Wipe off as much of the excess glue as you can with a damp cloth and leave the glue to cure overnight.
Remove the clamps and scrape off any glue drips.
Cut the board to the rough size you want using a circular saw, track saw or table saw.
Start sanding. 80 grit to start then 120 grit to get all the remaining glue off and any other imperfections. Just keep things flat.
Do any final cuts to get the board the right size if needed
Decide on what you want to do with handles and cut them into the sides, and round over the edges where needed.
Start the main sanding with more 120 grit and up to 240 grit. Don't forget to wet the grain in between for extra smoothness.
Now get the finish on. A couple of coats of mineral oil and a food-safe wax oil to finish off.
Say "oooh" and "wow" a lot. Job done.